Taxes in Sleek Bill Online – Create, Manage & Apply Tax Rates Easily
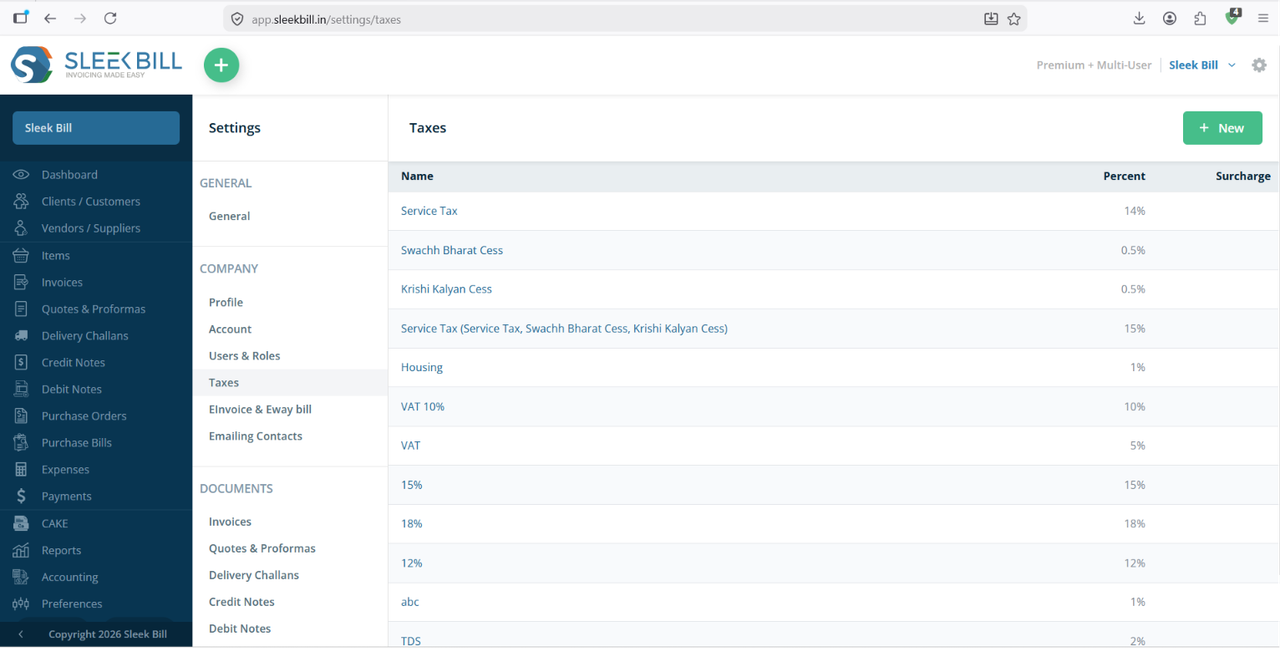
Managing taxes accurately is essential for every business. Whether you charge GST, VAT, Service Tax, TDS, or any custom tax, Sleek Bill Online makes tax management simple by allowing you to create, edit, and organize multiple tax rates from one place. As shown in the screenshot below, the Taxes section in Sleek Bill Online displays all your tax rates along with their percentages, making it easy to manage taxation for invoices, purchase bills, quotations, and other business documents.
Why Use the Taxes Module?
Businesses often need different tax rates for different products or services. Instead of manually entering tax percentages every time, Sleek Bill Online allows you to save tax configurations that can be reused across all transactions.
With the Taxes module, you can:
- Create unlimited tax rates
- Manage GST, VAT, Service Tax, TDS, and custom taxes
- Edit tax percentages whenever required
- Apply saved taxes while creating invoices and purchase bills
- Maintain consistency across all documents
How to Access Taxes in Sleek Bill Online
Follow these simple steps:
Step 1 : Open your browser and enter www.sleekbill.in. Then click on login button at right top corner.

Step 2 : After logging in, go to the Dashboard. From there, navigate to Preferences.

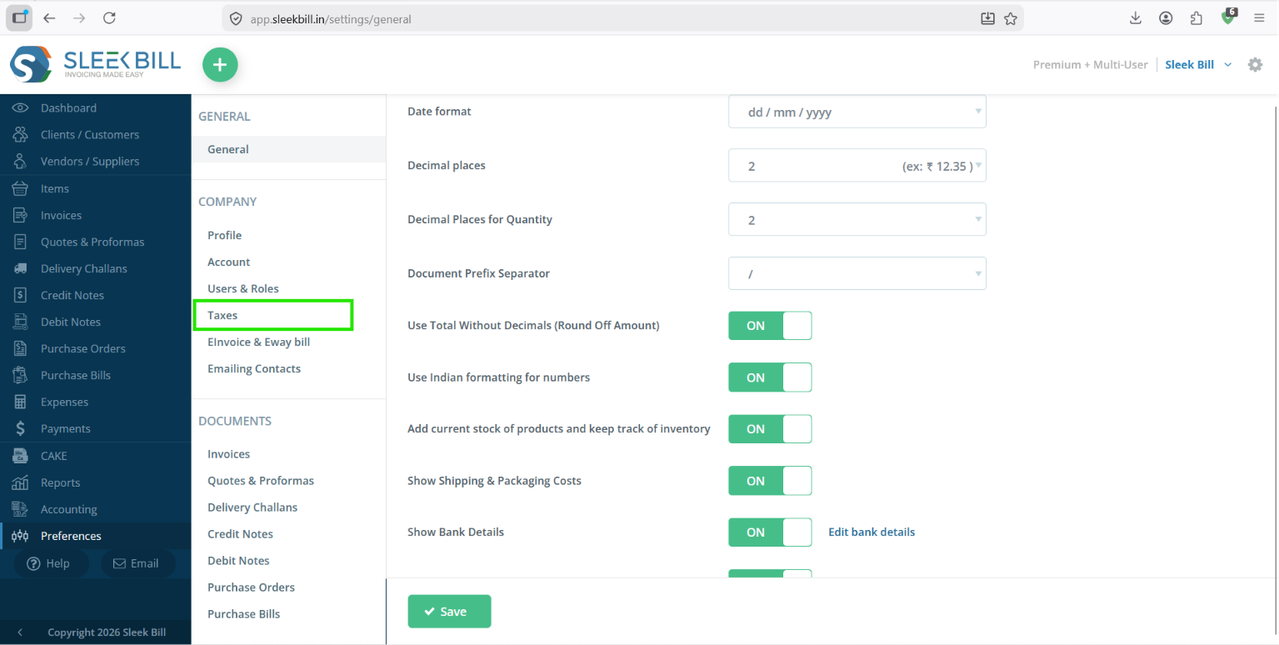
Step 3 : Inside Preferences, go to the “Taxes” in Company section.
Understanding the Taxes Screen
The Taxes page helps you quickly review every tax configured in your company account.
The table contains the following columns:
Name : Displays the name of the tax. Examples include: Service Tax, VAT, GST, TDS, Custom Tax. Using meaningful names makes selecting taxes while creating invoices much easier.
Percentage: Shows the tax percentage assigned to that tax.
Examples:
- 5%
- 12%
- 18%
- 28%
This percentage is automatically applied whenever the tax is selected in a transaction.
Surcharge: If a surcharge is applicable, it appears in this column. This allows businesses to maintain additional tax calculations where required.
How to Create a New Tax
Adding a new tax is simple.
Step 1 : Open your browser and enter www.sleekbill.in. Then click on login button at right top corner.
Step 2 : After logging in, go to the Dashboard. From there, navigate to Preferences.
Step 3 : Inside Preferences, go to the “Taxes” in Company section.
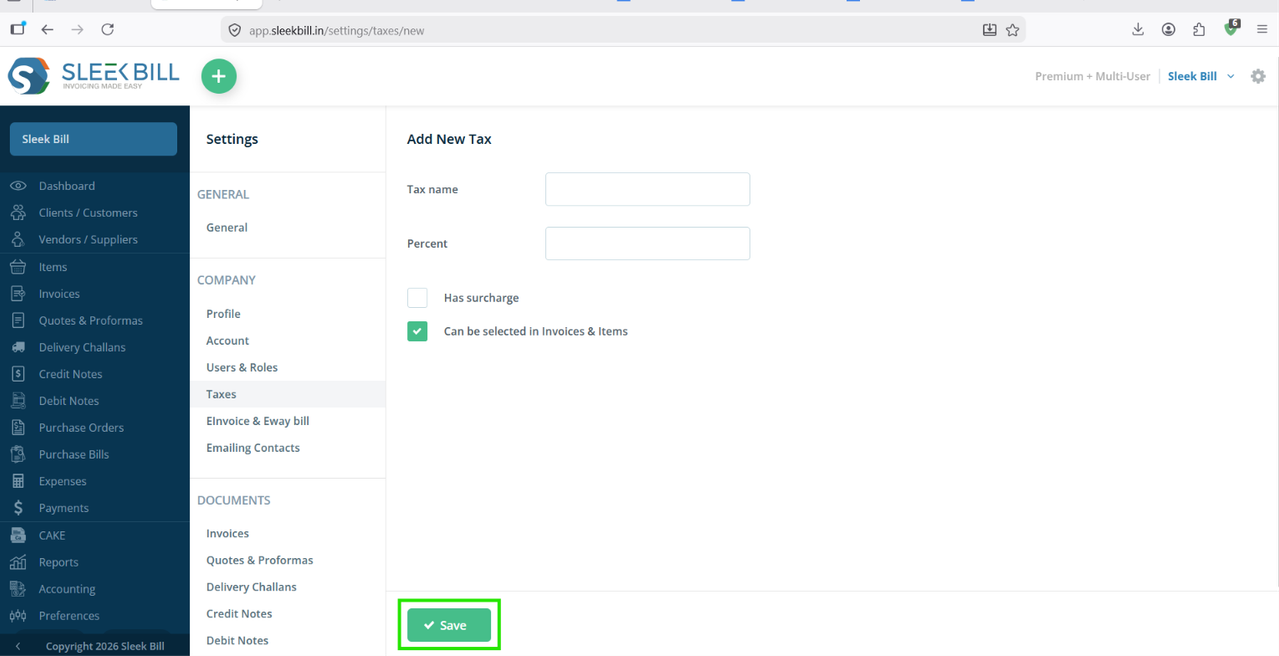
Step 4 : Go to the Taxes page.
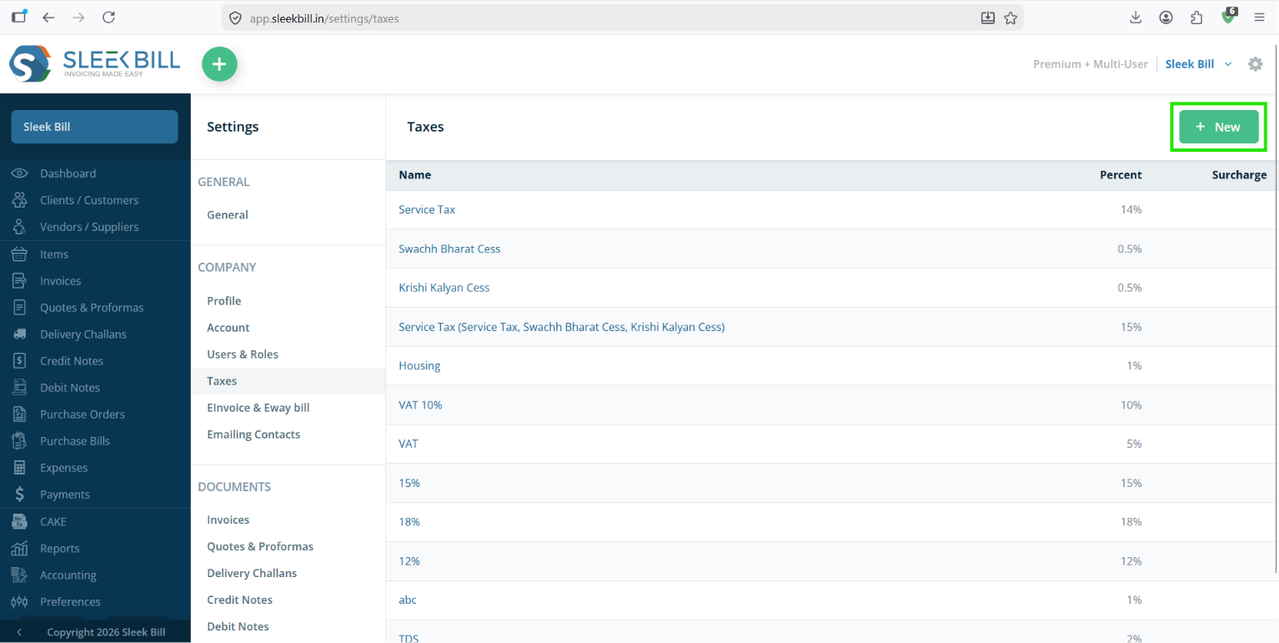
Step 5 : Click the + New button available in the top-right corner.
Step 6 : Enter the Tax Name, Tax Percentage, Surcharge (optional)
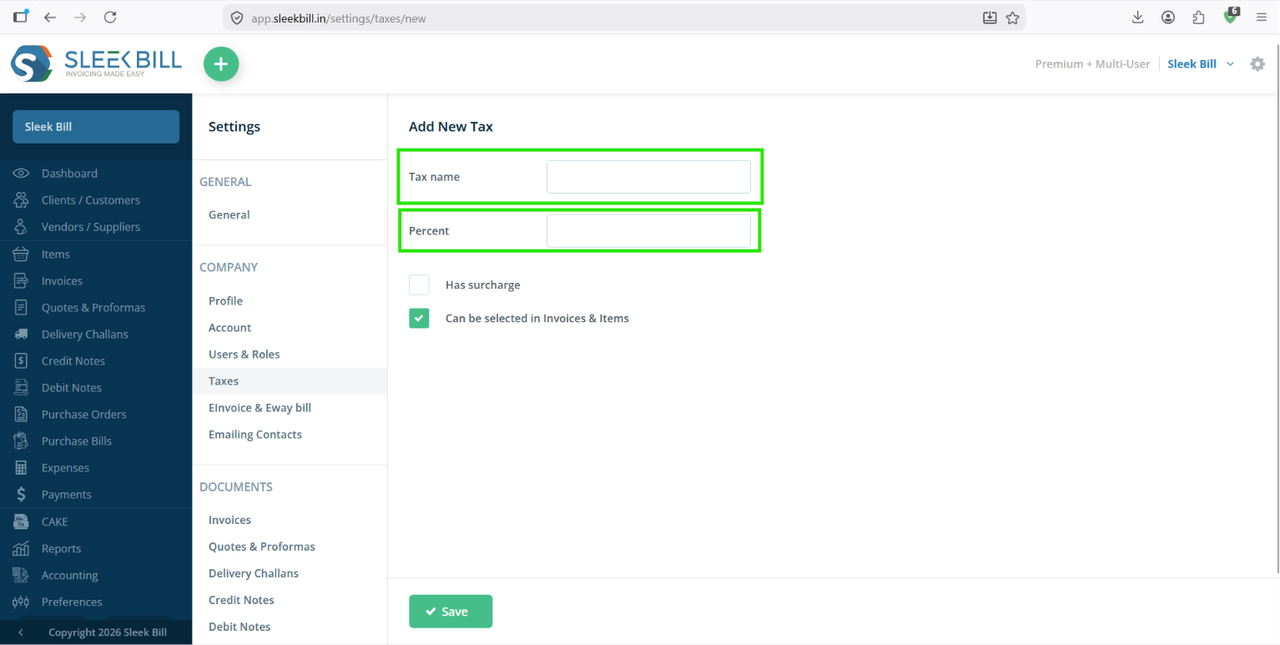
Step 7 : Save the tax.
Benefits of Saving Taxes
Instead of typing tax details every time, saved taxes offer several advantages:
- Faster invoice creation
- Reduced manual errors
- Consistent tax calculations
- Easy selection from drop-down menus
- Better compliance with taxation requirements
Where Can These Taxes Be Used?
Once created, tax rates can be applied across various documents, including:
- Sales Invoices
- Purchase Bills
- Quotations
- Proforma Invoices
- Delivery Challan
- Credit Notes
- Debit Notes
This ensures the same tax structure is maintained throughout your business documents.
When Should You Update Tax Rates?
You should edit or create new tax entries whenever:
- Government tax rates change
- Your business introduces new products with different tax slabs
- You begin serving customers in different tax categories
- New compliance rules require additional taxes
Updating the tax master automatically simplifies future transactions.
Conclusion
The Taxes module in Sleek Bill Online provides a centralized way to create, organize, and manage all your business tax rates. Whether you work with GST, VAT, Service Tax, TDS, or custom taxes, you can configure them once and apply them effortlessly across invoices, purchase bills, quotations, and other documents.
By maintaining an up-to-date tax list, businesses can improve billing accuracy, reduce manual effort, and ensure consistent tax calculations across every transaction.
Was this article helpful?