🧾 Billing & Invoicing
How to Show Contact Person in the “Bill To” Section
When creating invoices, displaying the contact person’s name in the “Bill To” section can make your documents more clear and professional especially when dealing with companies that have multiple points of contact. In this guide, we’ll see through the simple steps to enable this feature in Sleek Bill.
Why Enable “Show Contact Person” in Invoice?
Adding a contact person to your invoice helps you:
- Clearly identify who the invoice is addressed to
- Improve communication with clients
- Maintain better records for businesses with multiple contacts
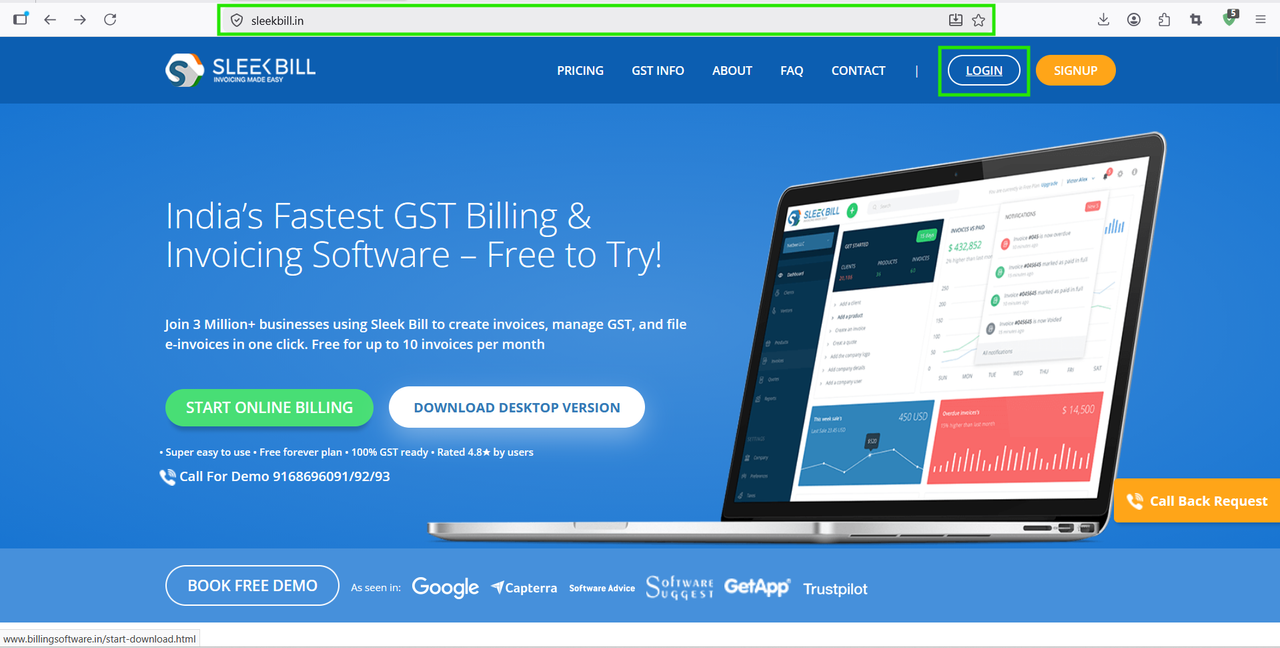
Step 1 : Open your web browser and type www.sleekbill.in, then press Enter. Once the website loads, click on the Login button at the top-right corner.
Step 2 : On the login page enter your Email ID then enter your Password. Click on the Sign In button.
.png)
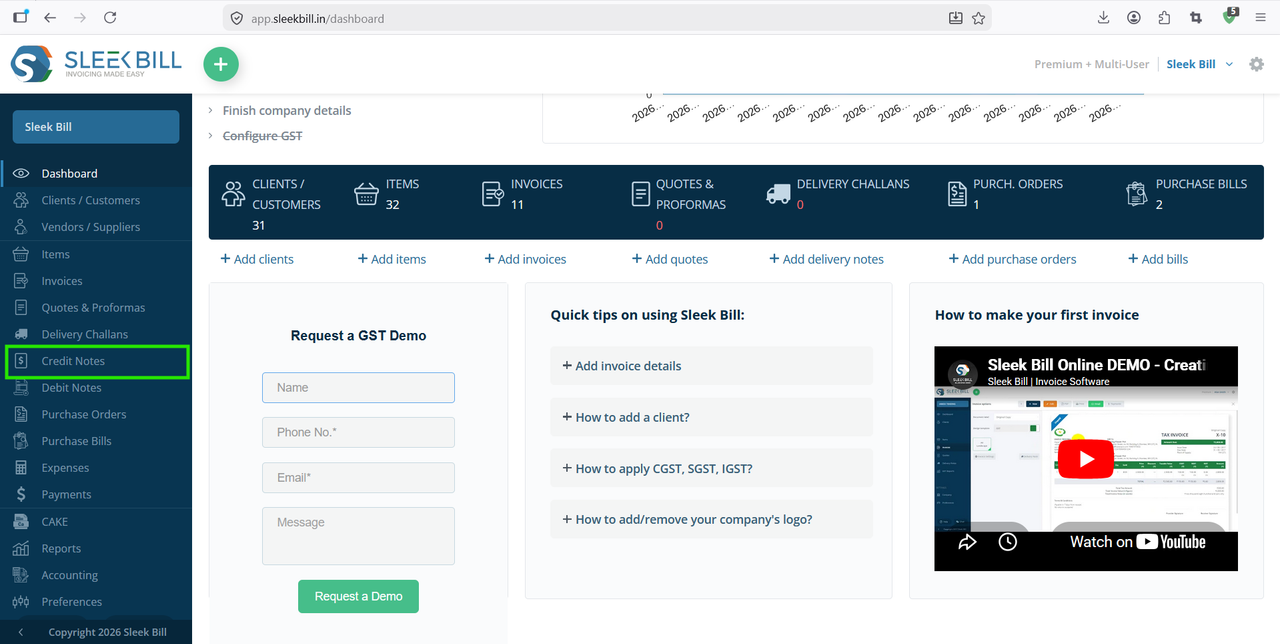
Step 3 : After logging in, you will be redirected to your dashboard. From the dashboard you will navigate to the Preferences section. This is where all your system settings are available
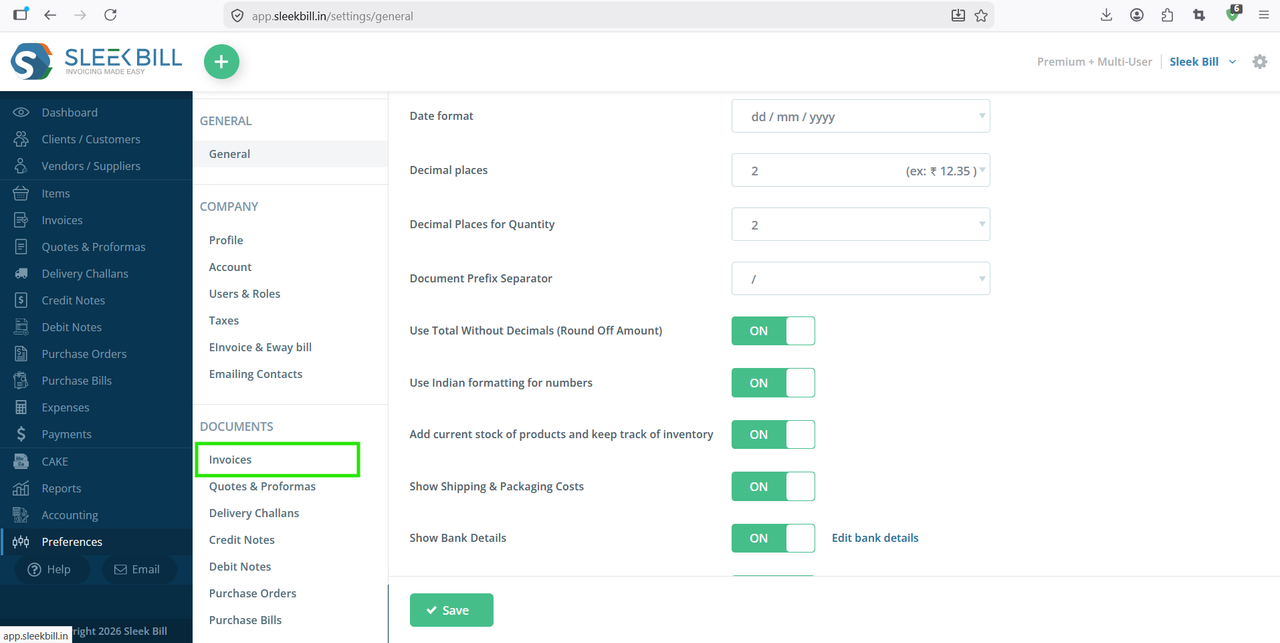
Step 4 Inside Preferences, go to the Invoice section. You’ll find it in the sidebar menu (usually towards the bottom).
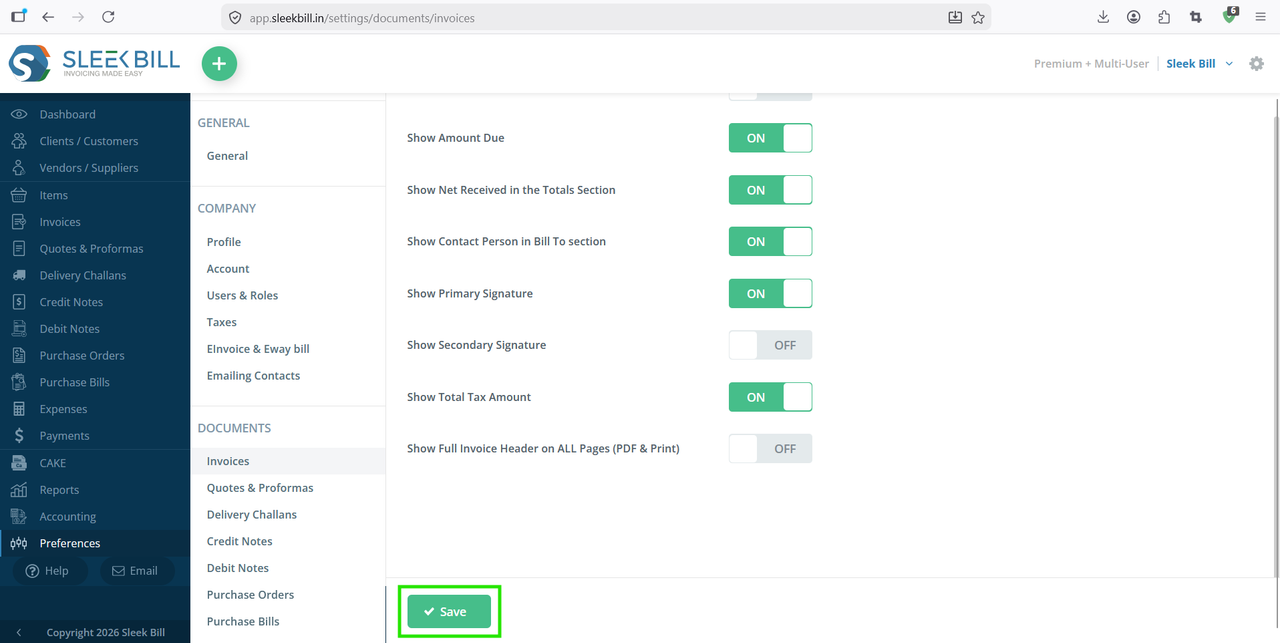
Step 5 : Look for the option “Show Contact Person in Bill To Section”. Toggle the option ON
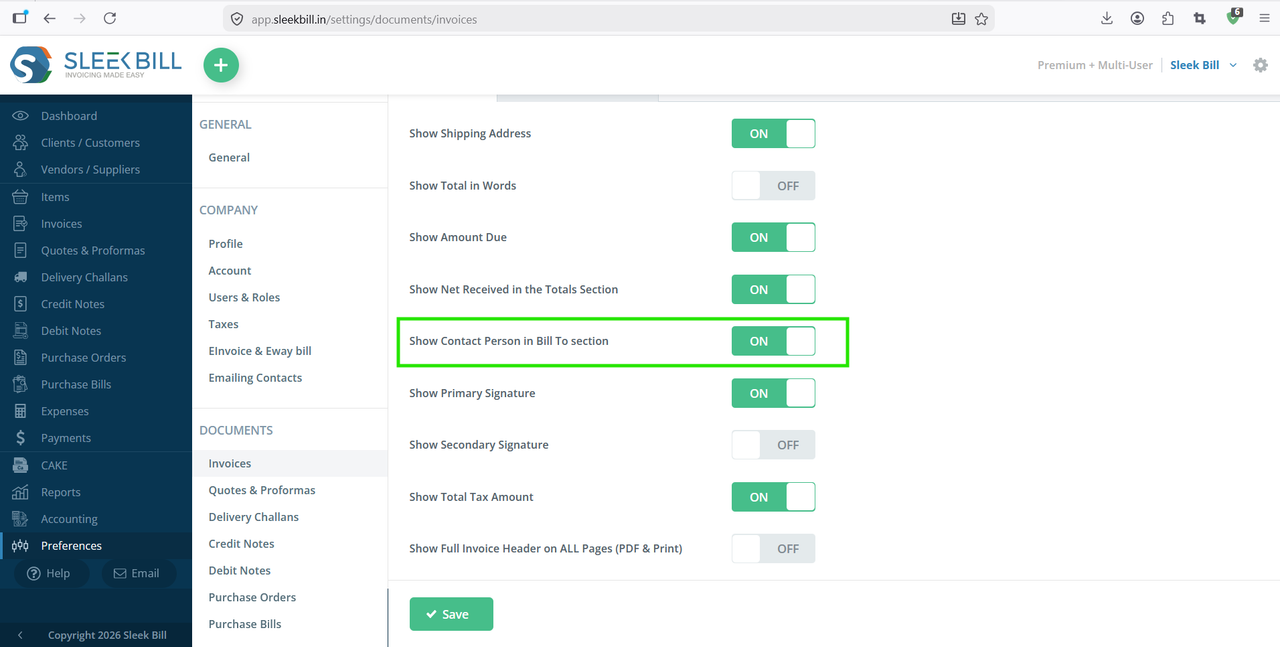
Step 6 : Scroll down to the bottom of the page. Click on the Save button to apply changes.
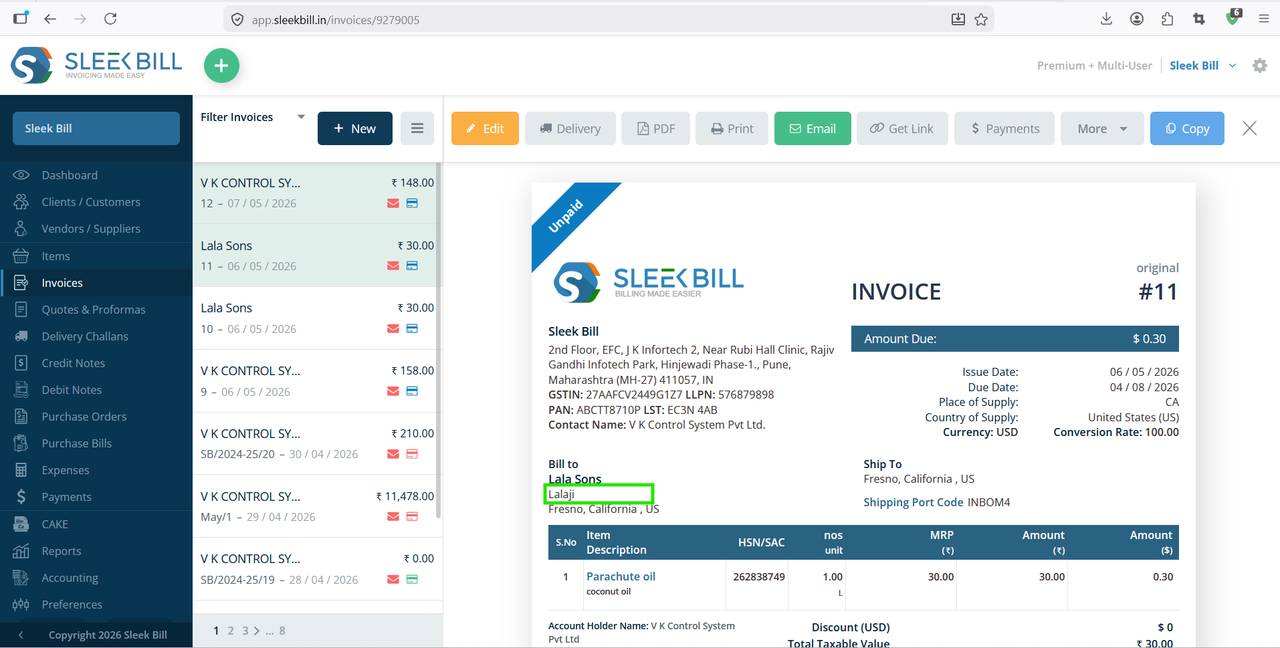
Now go to the Invoices section. Open or create an invoice
In the preview, you will see the contact person’s name displayed in the Bill To section.
Conclusion
Enabling the contact person in the “Bill To” section is a small change that adds a big improvement to your invoices. It ensures clarity, professionalism, and better communication with your clients.
If you regularly deal with businesses or teams, this feature can make your invoicing process more organized and efficient.
Was this article helpful?