How to Use or Add Extra Fields in Invoice in Sleek Bill?
How to Use or
Add Extra Fields in Invoice in Sleek Bill
Hello Sleek
Bill users, welcome to the Sleek Bill Knowledge Hub.
Here, in this article we will learn to add the Extra Fields to the Invoice and using it in Sleek Bill.
Occasionally, a business will require certain information on its invoice which cannot be displayed in the normal invoice template. This might be additional details such as Vehicle Number, Delivery Date, Sales Person Name, Customer Reference, Project Name or any other business specific information.
In Sleek Bill‘s
Extra Fields, you can opt to add extra information to your invoices, which
makes them more functional, more professional and in accordance with your
particular needs.
It is easy to
activate and use Extra Fields with Sleek Bill, simply use few clicks.
Why Should You Use Extra Fields in Invoices?
- Display additional business information on invoices.
- Add Vehicle Number, Delivery Date, or Customer Reference.
- Create more professional and customized invoices.
- Improve communication with customers.
- Reduce manual writing on printed invoices.
- Make record-keeping easier for future reference.
How to Add
Extra Fields in Invoice in Sleek Bill
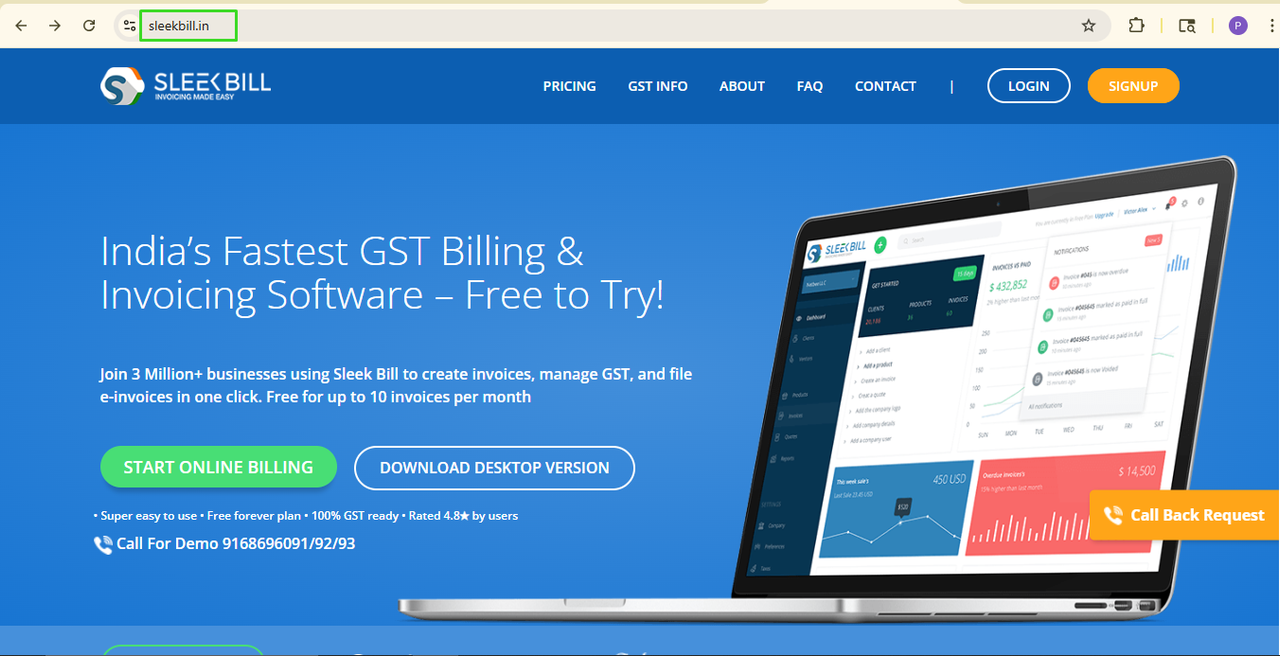
Step 1: Open
the Sleek Bill Website
Open your
preferred web browser and visit the Sleek Bill website.
Search for
Sleek Bill and open the official website.
Step 2: Click
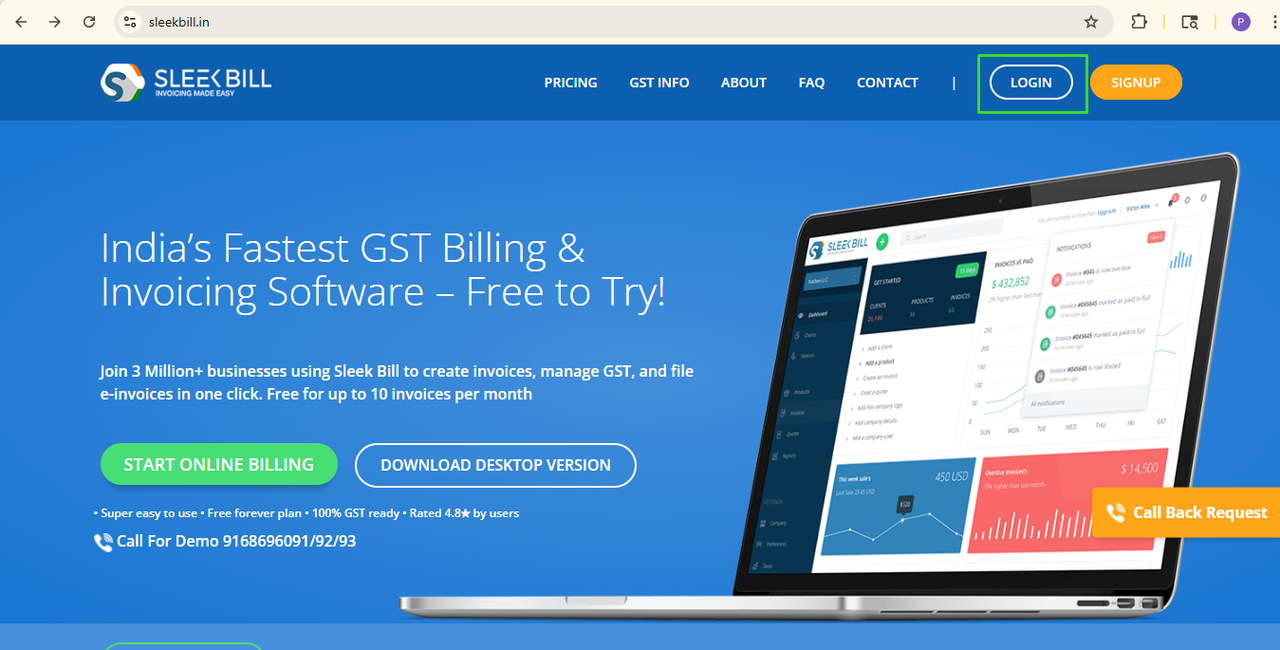
on the Login Button
Click on the
Login button available at the top-right corner of the website.
Step 3: Enter
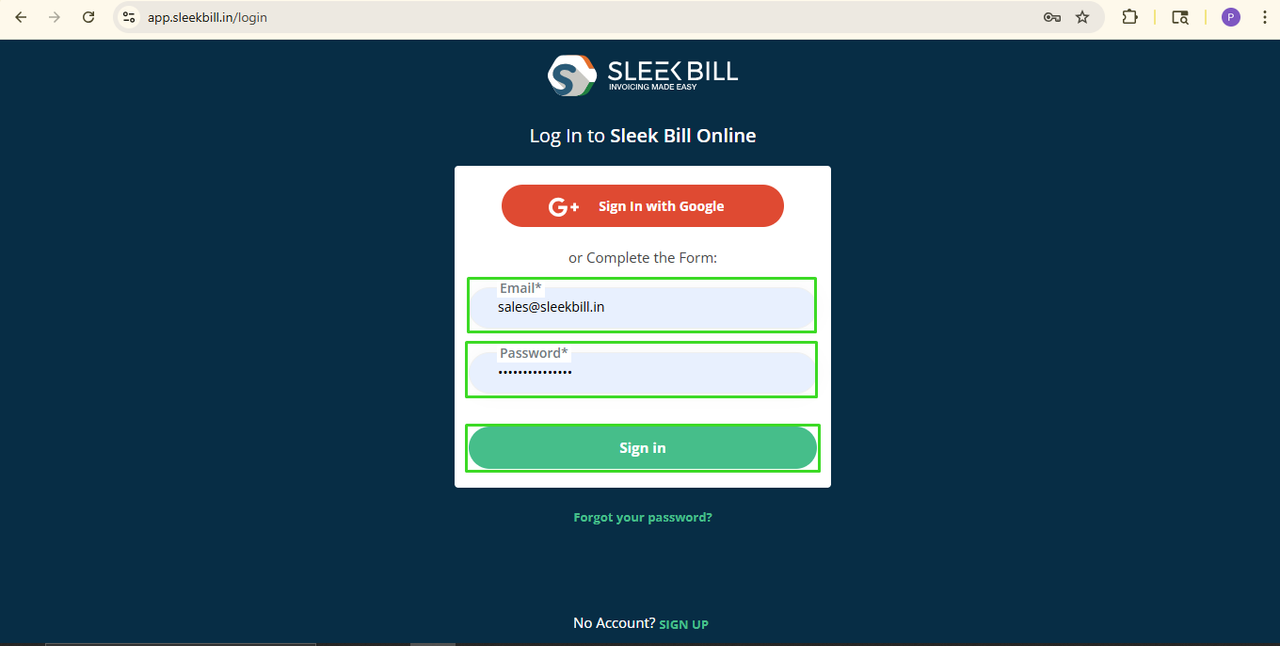
Your Login Details
Enter your
registered Email ID and Password.
Click the Sign
In button to access your dashboard.
Step 4: Open
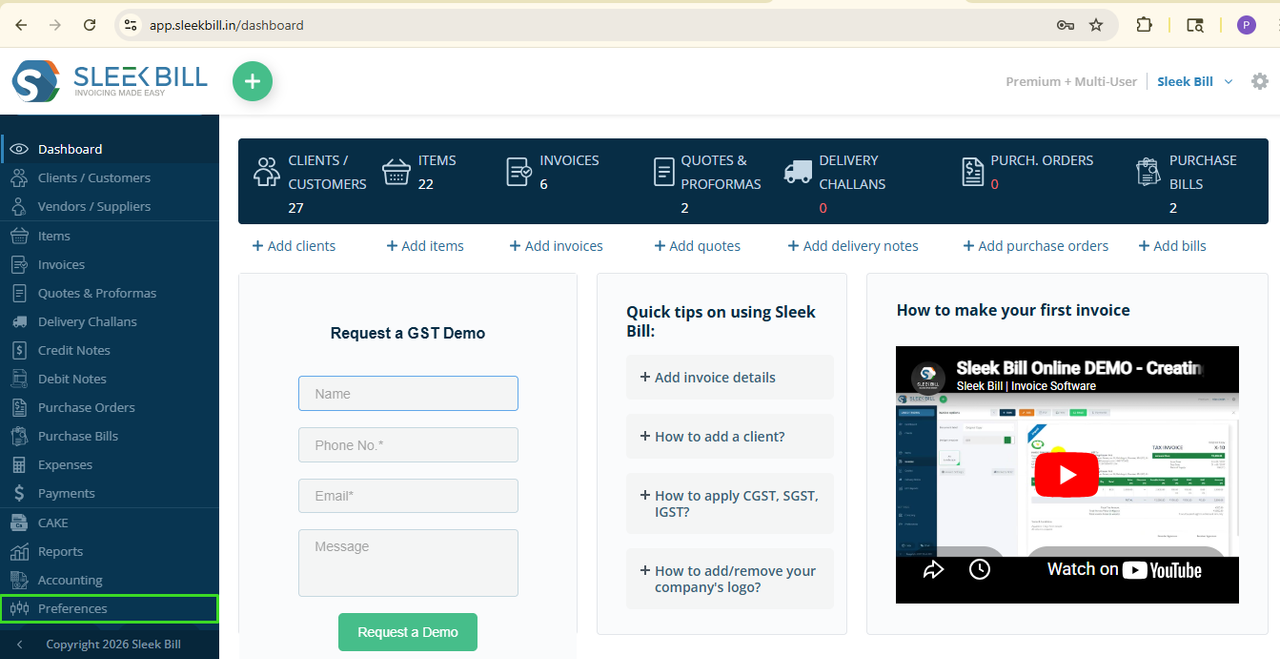
the Preferences Menu
After logging
in, you'll reach the Sleek Bill dashboard.
Click on the
Preferences tab from the main menu.
Step 5: Open
Invoice Setting
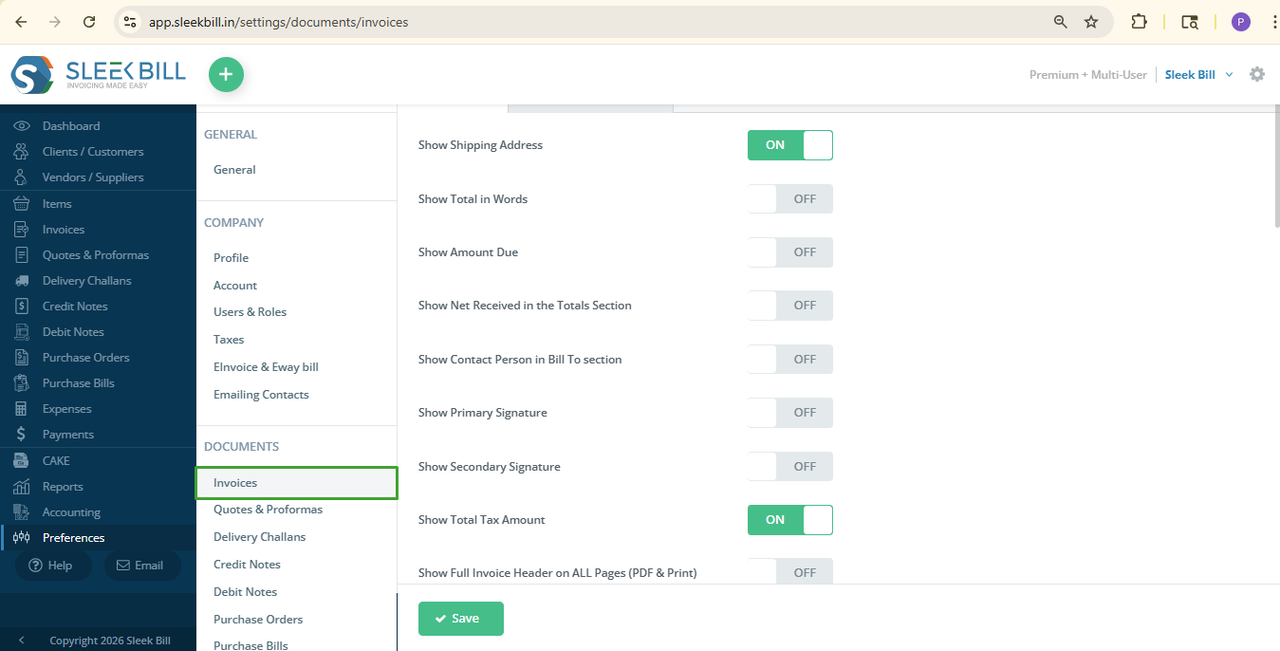
Step 6: Scroll
down Here you'll find various Custom field1 and custom field 2 Label options.
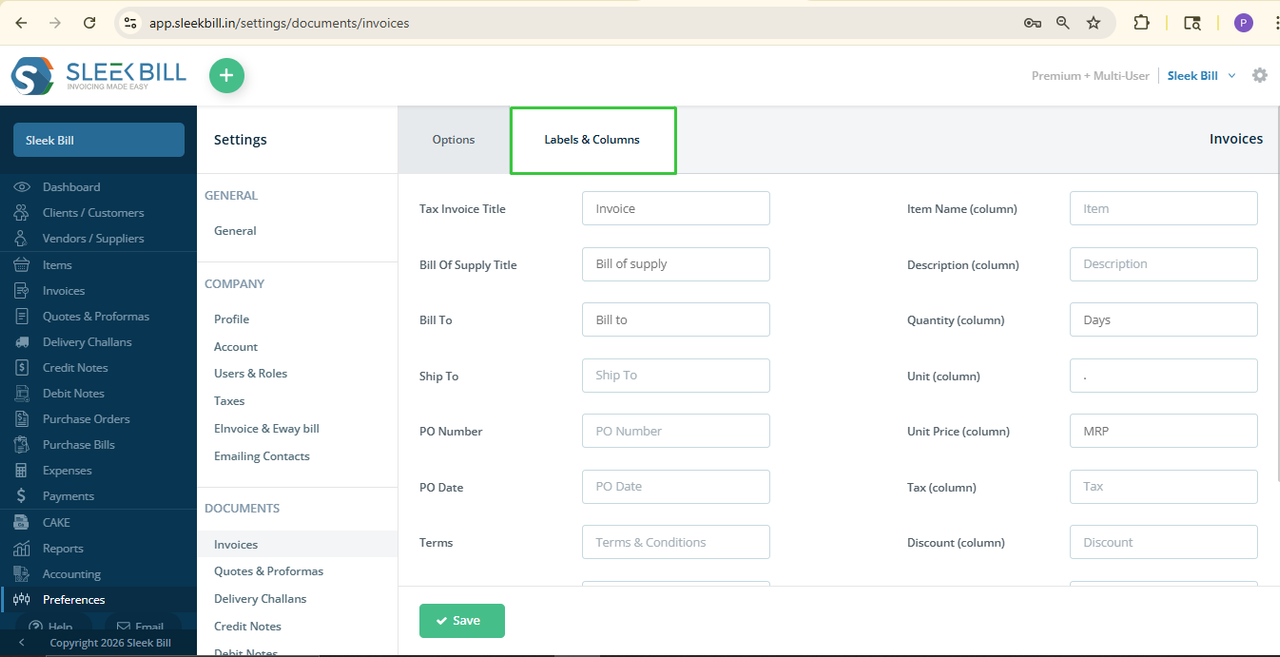
Step 7: Enable Extra Fields
Enter the field names you want to display on your invoices.
For example:
- Vehicle Number
- Delivery Date
- Customer Reference
- Project Name
- Sales Person
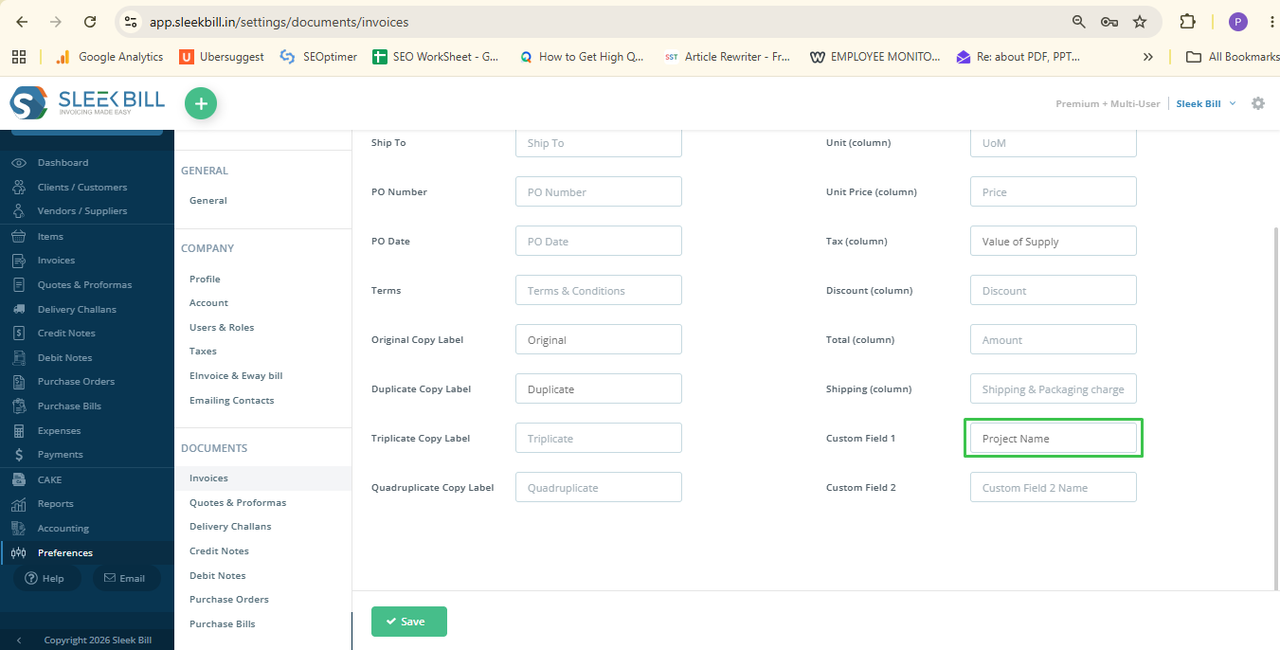
Step 8: Save
the Settings
After entering
the required field names, click the Save button.
Your Extra
Fields are now successfully enabled.
How to Use
Extra Fields While Creating an Invoice?
Now create a
new invoice.
The Extra Fields will also show on the invoice screen:
Just put in
what it asks for and when you go to save or print the invoice.
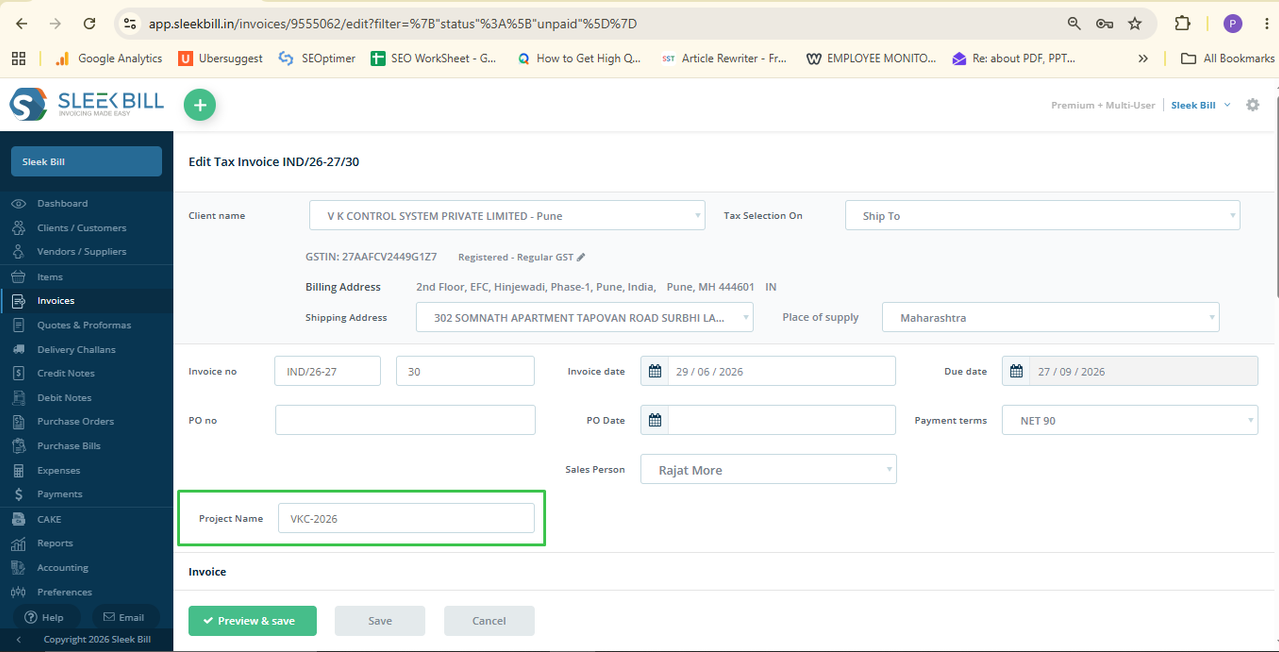 The details entered will be automatically inserted onto the final
invoice.
The details entered will be automatically inserted onto the final
invoice.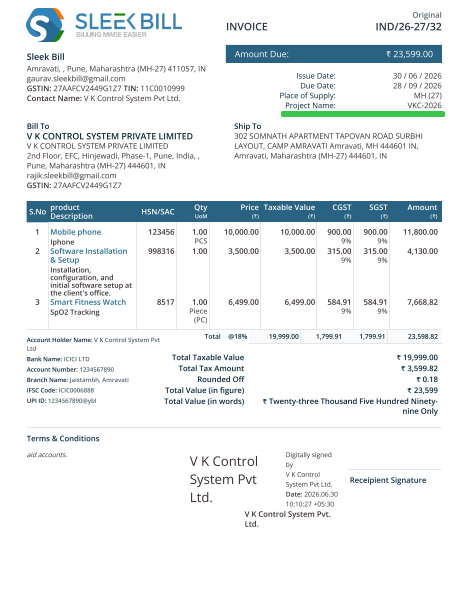
What Happens
After Enabling Extra Fields?
When Extra Fields are enabled, this is where you will add any extra information you need when creating a new invoice.
The information fields are visible on both printed and pdf invoice so you can always show your business information to your customers.
Whatever you
want to include on the invoice such as Delivery Details, Vehicle Number or any
other custom reference, Extra Fields enable you to generate custom invoices.
Conclusion
A way to add a lot of extra information to your bills without changing the bill format is the Extra Fields. They are very simple to use but have a big impact.
Whether you wish to include a Vehicle Number, Delivery Date, Customer Reference or other custom fields, Extra Fields will make your invoices clearer, tidier and more stylish.
With just a few
clicks, you can customize every invoice and even streamline your billing
process as a whole.
Was this article helpful?